
Set up the LLM
An AI agent needs a “brain” (an LLM) to think and reply. This page gives realvco’s recommended combo first, then shows how to connect it to OpenClaw (Rose) and Hermes (Ada / Vi).
realvco’s recommendation: ChatGPT subscription + DeepSeek API
The most cost-effective, lowest-hassle combo for most users: one ChatGPT subscription (to drive Codex) + one cheap DeepSeek API key (a budget backup).
ChatGPT subscription (for Codex)
A single monthly subscription includes Codex usage, so you don’t have to manage a separate API bill — the easiest option.
- Plan tiers: Free $0 / Go $8 / Plus $20 / Pro $100 (per month).
- Which to pick: Plus is enough for light-to-moderate use; go Pro if you regularly hit limits or do heavy development (roughly 5–20× the Codex allowance).
- Plus’s rough Codex allowance: about 10–60 cloud tasks and 15–80 GPT-5.5 messages per 5-hour window.
- See the latest plans → openai.com/chatgpt/pricing; Codex allowance → chatgpt.com/codex/pricing
DeepSeek API (cheap backup / budget workhorse)
Tokens are very cheap, and one API key is all you need — ideal for high volume or keeping costs down.
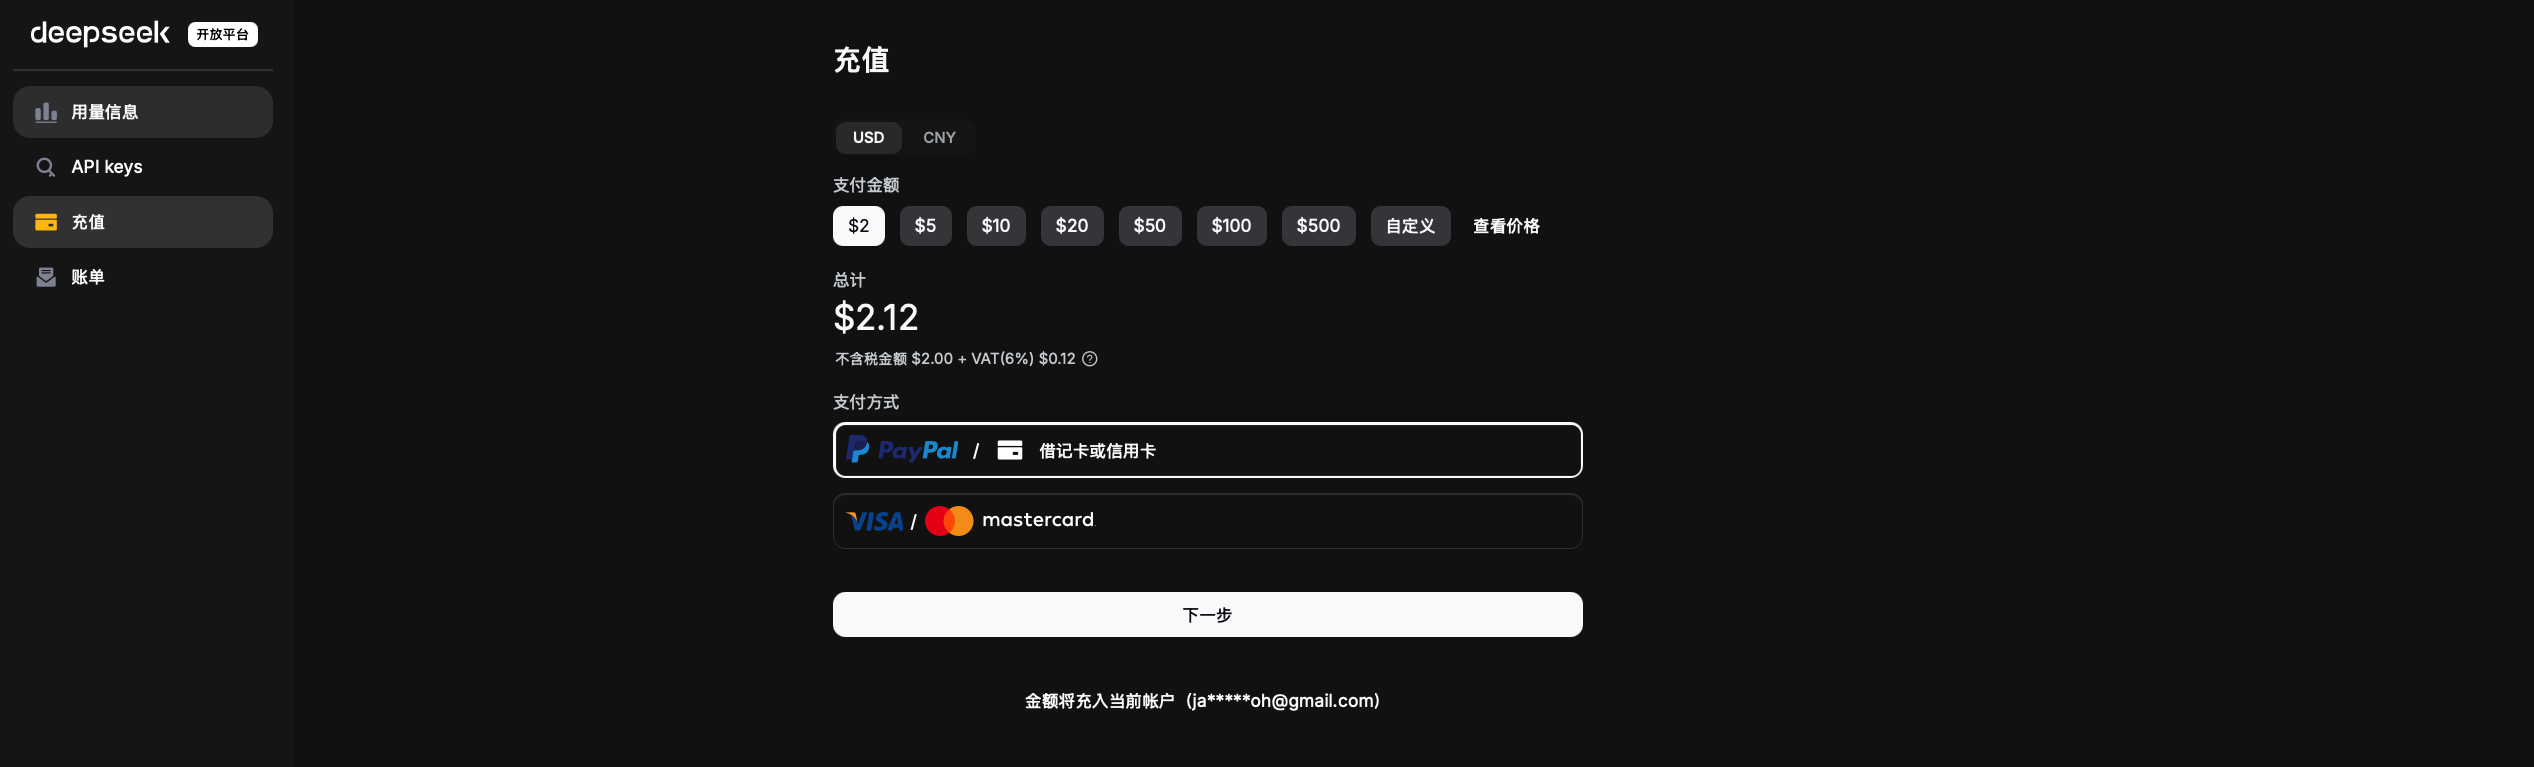
- Prepaid, from about $2, pay only for what you use.
- Rates (as of 2026-06): V4 Flash is about $0.14 / million input tokens and $0.28 / million output; a cache hit drops to roughly a fifth of that or less — big savings.
- New accounts usually get a free allowance to try first.
- See the latest rates → api-docs.deepseek.com/quick_start/pricing
Which to choose (quick comparison)
| Combo | Best for | Rough cost |
|---|---|---|
| ChatGPT Plus | Light-to-moderate, no bill-watching | Fixed $20 / month |
| ChatGPT Pro | Heavy, often hits Plus limits | Fixed $100 / month |
| DeepSeek API | High volume, cost-conscious / backup | Pay per use, very low |
Prices and allowances follow the official pages. The figures here are as of 2026-06 and may change when OpenAI / DeepSeek adjust pricing.
Setup guide: four combinations
Below you’ll connect the brain to both engines. Click any item to jump straight to its steps and video:
Rose runs OpenClaw; Ada / Vi run Hermes. The two engines have slightly different setup flows, so just follow the matching section.
Connect through OpenClaw (Rose)
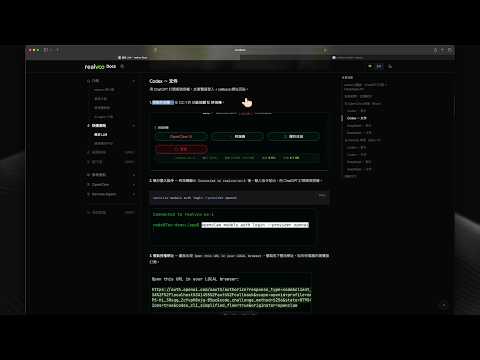
Codex - Video
Codex - Steps
Authorize with your ChatGPT subscription account, via a browser login + pasting the callback URL back.
1. Open the terminal — on OC-1, click the action buttons, then Terminal.
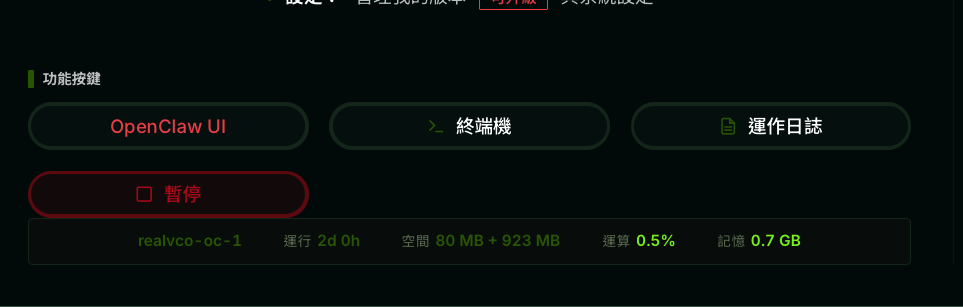
2. Run the login command — once the terminal shows Connected to realvco-oc-1, send the command to authorize with your ChatGPT subscription account.
openclaw models auth login --provider openai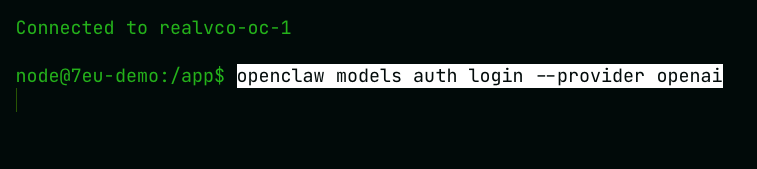
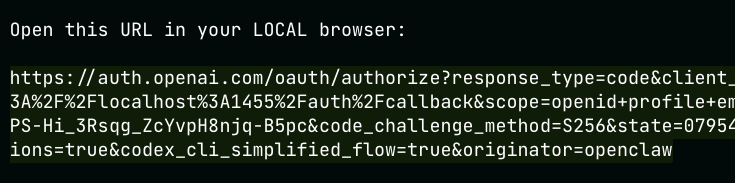
3. Copy the authorization URL — when Open this URL in your LOCAL browser appears, copy the whole URL below it and open it in your computer’s browser.
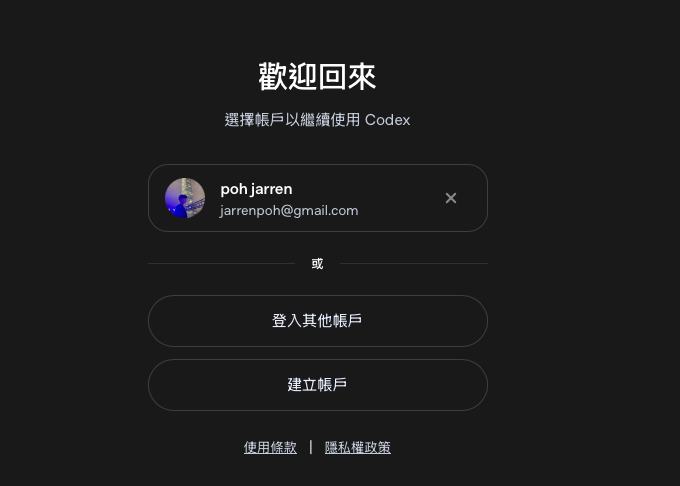
4. Log in to your ChatGPT account — in the browser, pick (or log in to) your ChatGPT account to continue with Codex.
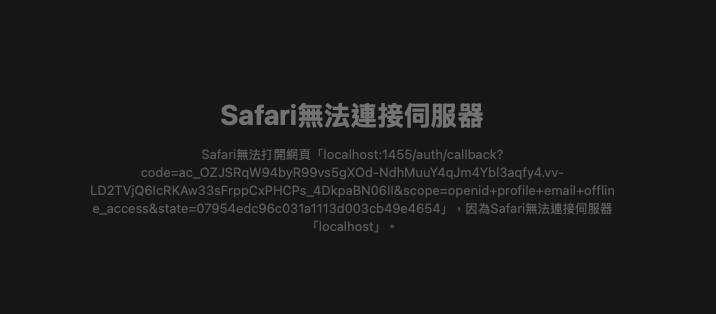
5. A “can’t connect” page is normal — after authorizing, the browser shows an error page that can’t reach localhost. This is expected; ignore it.
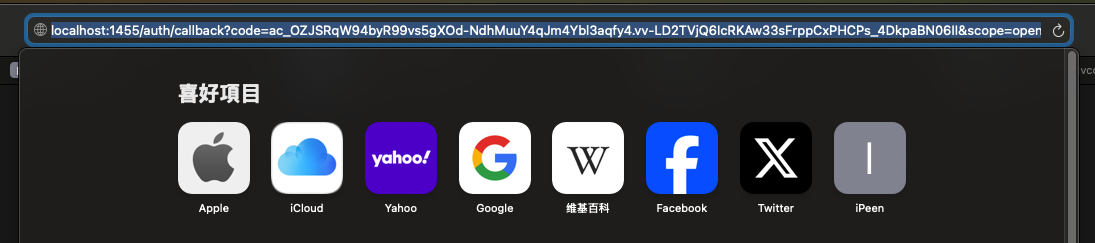
6. Copy the browser address bar — copy the whole localhost:1455/auth/callback?... URL now in the address bar.
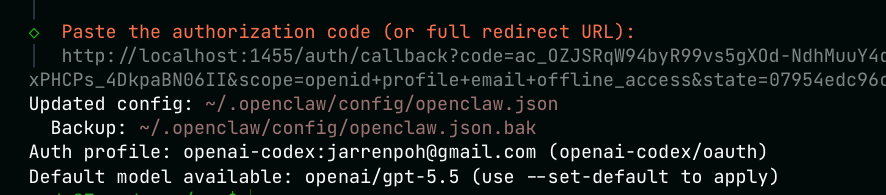
7. Paste back into the terminal — after Paste the authorization code (or full redirect URL):, paste the URL you just copied and press Enter.

8. Done — when you see Updated config, Auth profile: openai-codex:..., and Default model available: openai/gpt-5.5, Codex is connected.
DeepSeek - Video

DeepSeek - Steps
A setup wizard guides you; get an API key from the DeepSeek platform and paste it back into the terminal.
1. Start the DeepSeek setup wizard — in the OC-1 terminal, run:
openclaw onboard --auth-choice deepseek-api-key
2. Confirm the prompt — at the “personal-by-default” prompt, choose Yes.

3. Setup mode — choose QuickStart (recommended).

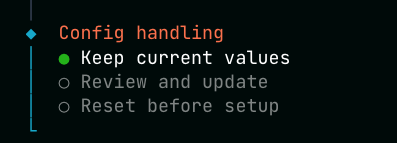
4. Config handling — choose Keep current values.
Next the wizard asks for your DeepSeek API key — get it from the platform first:
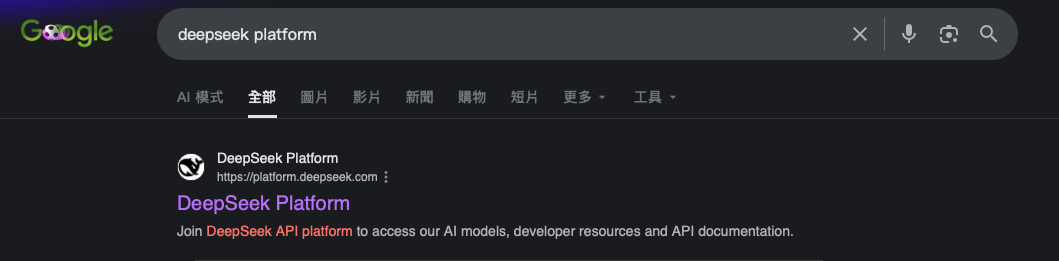
5. Open the DeepSeek platform — go to platform.deepseek.com.
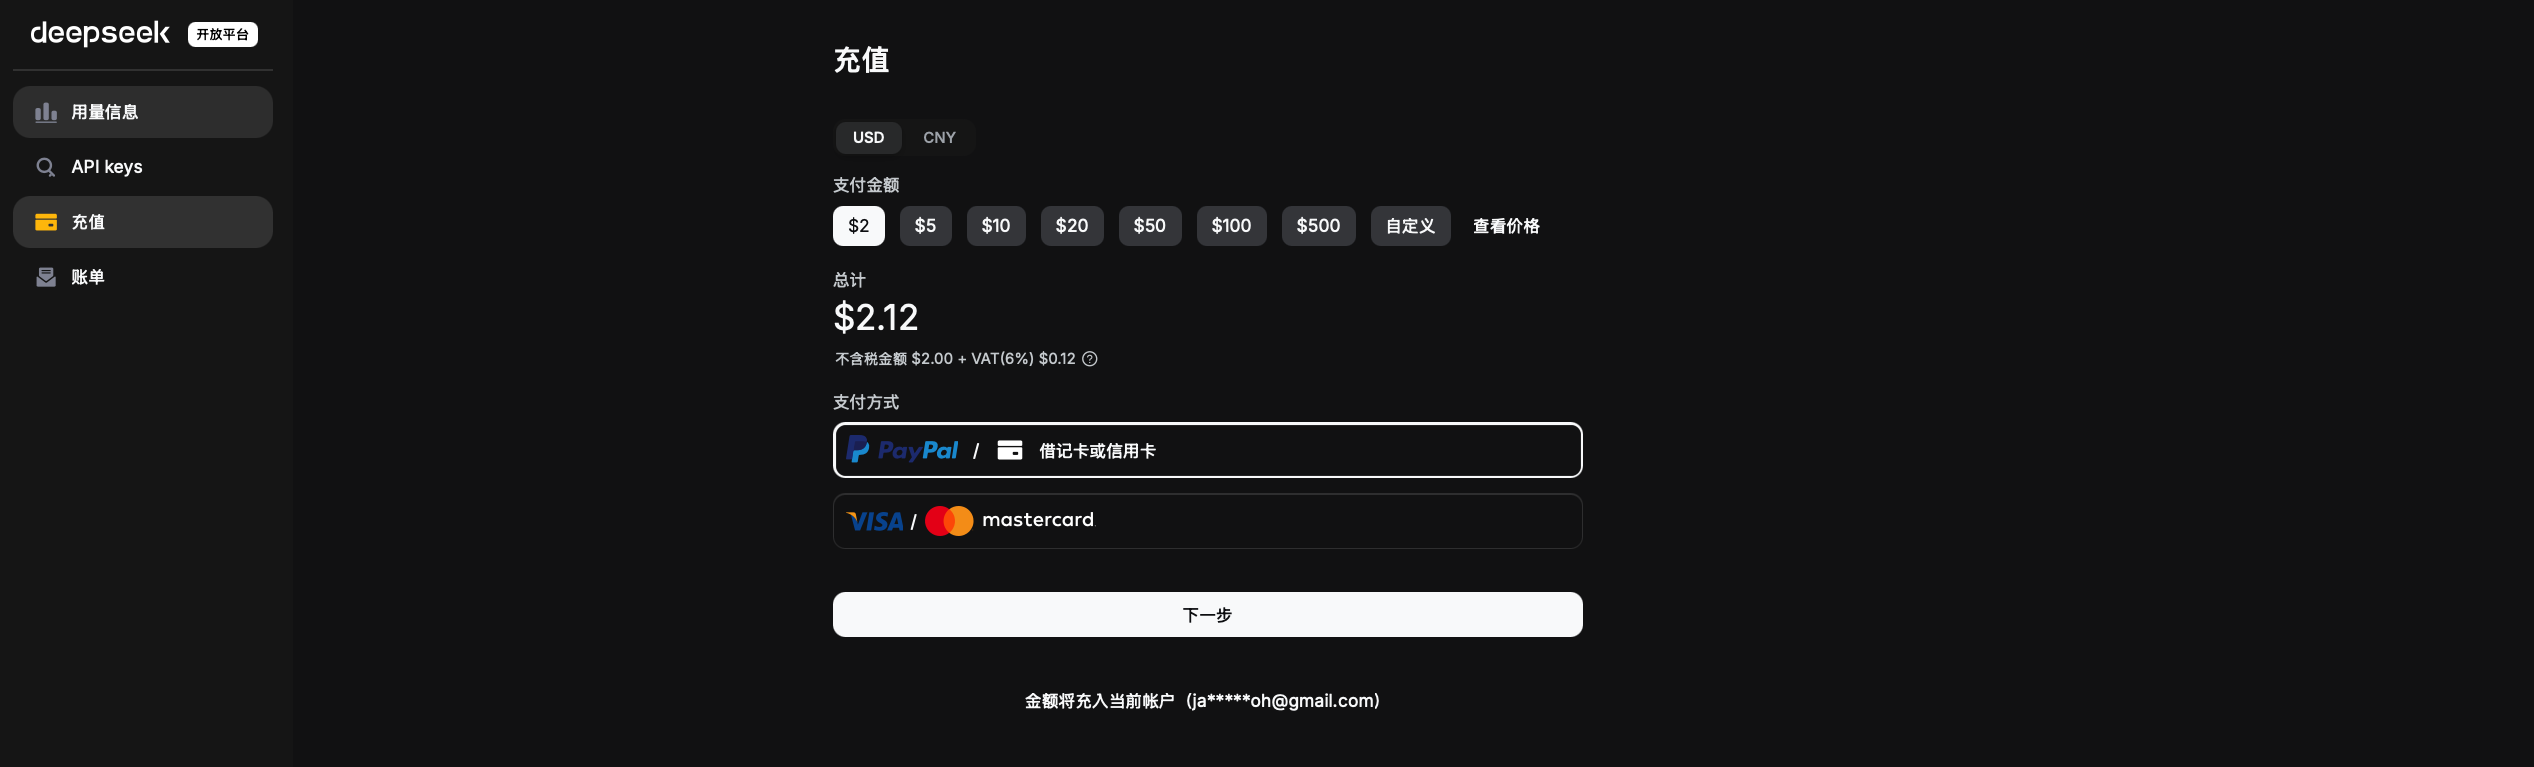
6. Top up — under “Top up”, pick an amount and pay (DeepSeek is prepaid, and tokens are cheap).
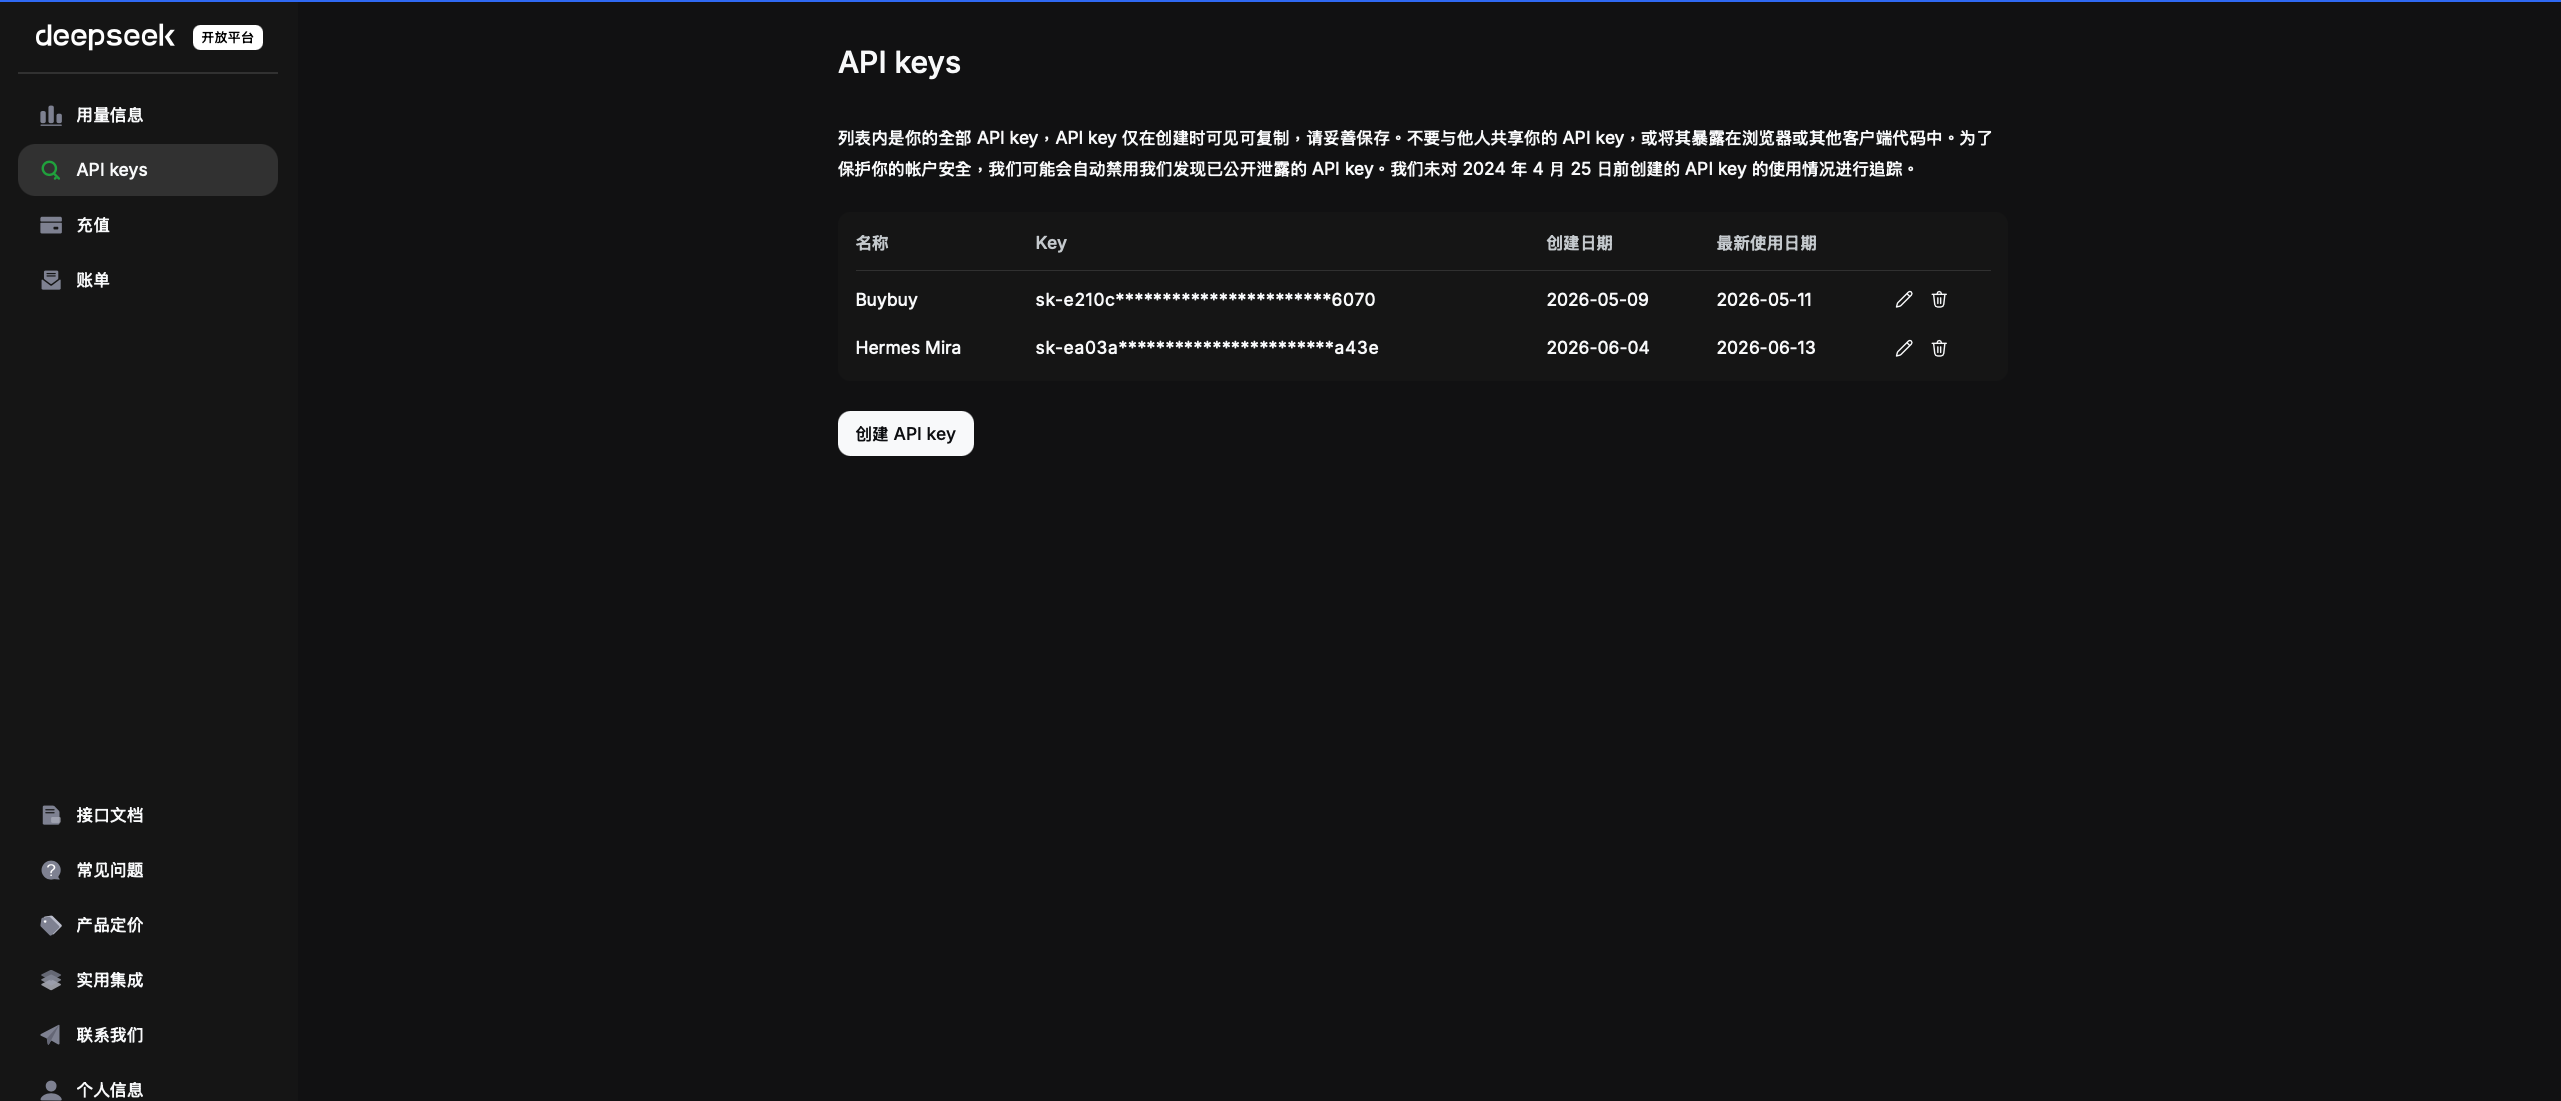
7. Create an API key — under “API keys”, click “Create API key” and copy it (shown only once).
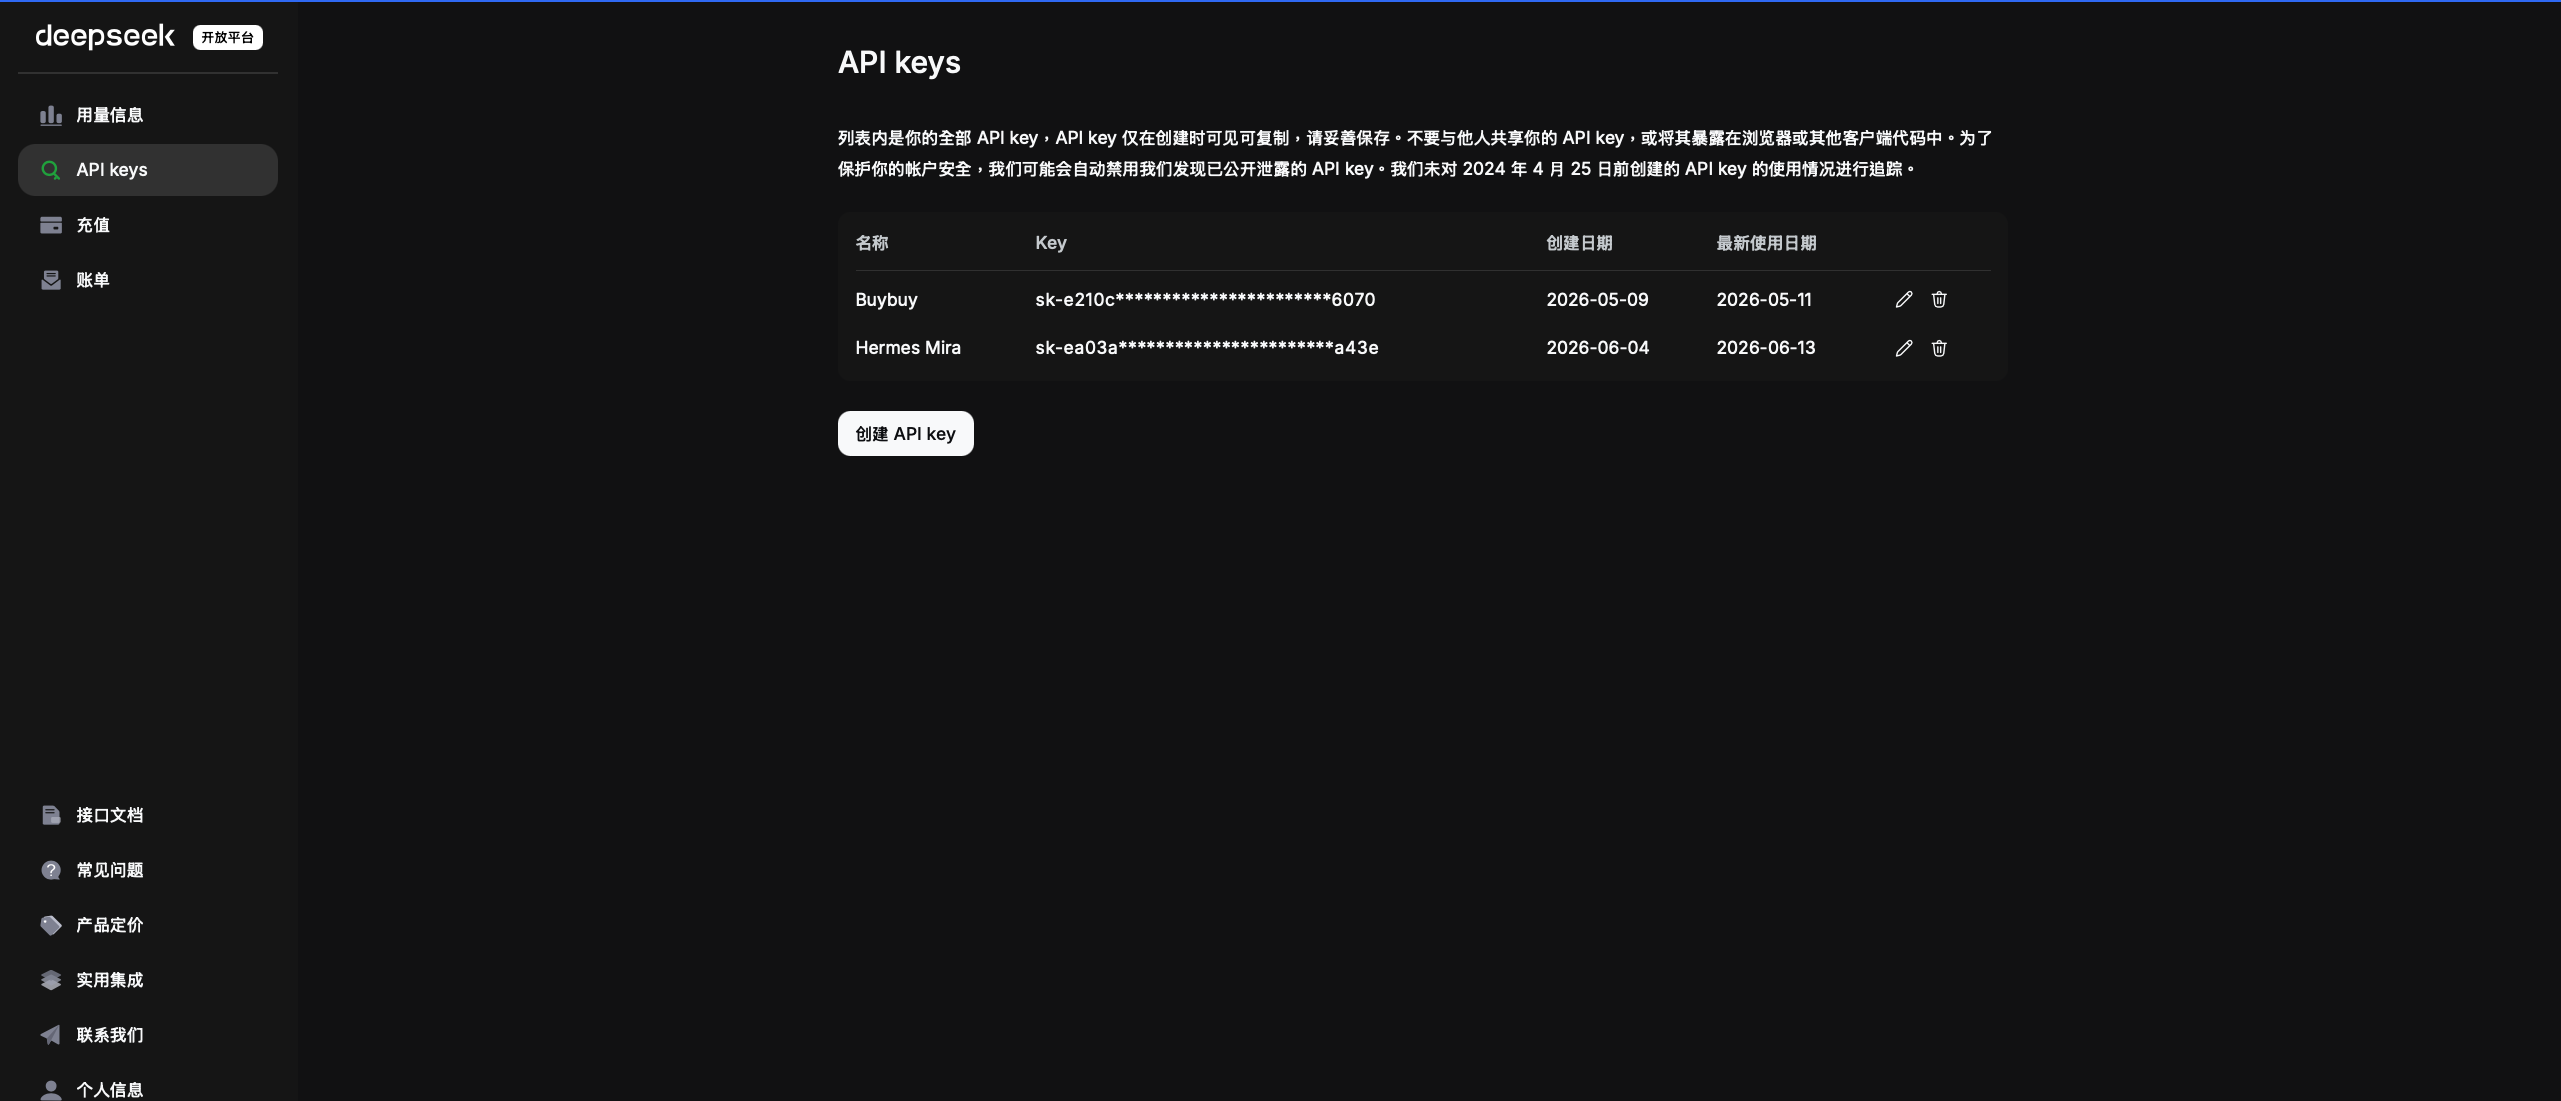
8. Paste back into the terminal — paste the key at “Enter DeepSeek API key” to finish.

Connect through Hermes (Ada / Vi)
Codex - Video
Codex - Steps
Also authorized with your ChatGPT subscription account, but via a device code flow — different from OpenClaw.
1. Open the terminal — on HM-2, click the action buttons, then Terminal.
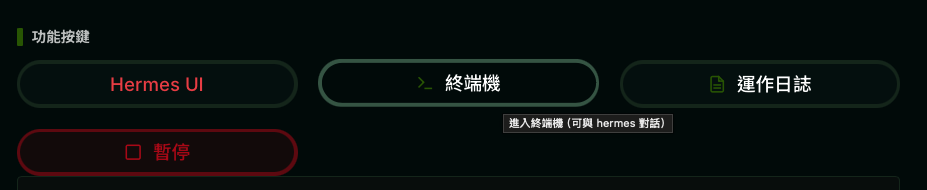
2. Run the setup command — once the terminal shows Connected to realvco-hm-2, send the command.
hermes model
3. Choose the provider — in the Select provider list, arrow down to OpenAI Codex and press Enter.
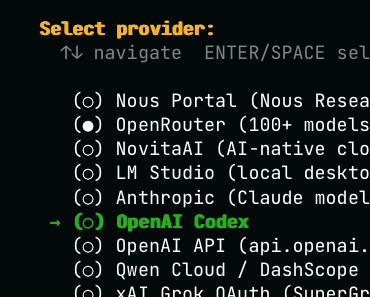
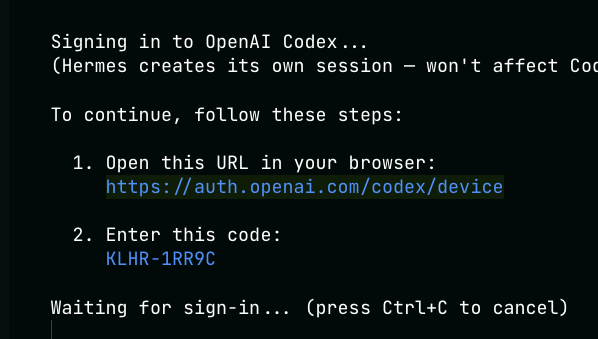
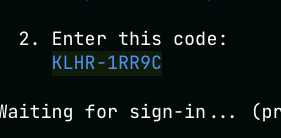
4. Note the URL and code — the screen gives a URL https://auth.openai.com/codex/device and a device code (e.g. KLHR-1RR9C). The terminal waits at Waiting for sign-in....
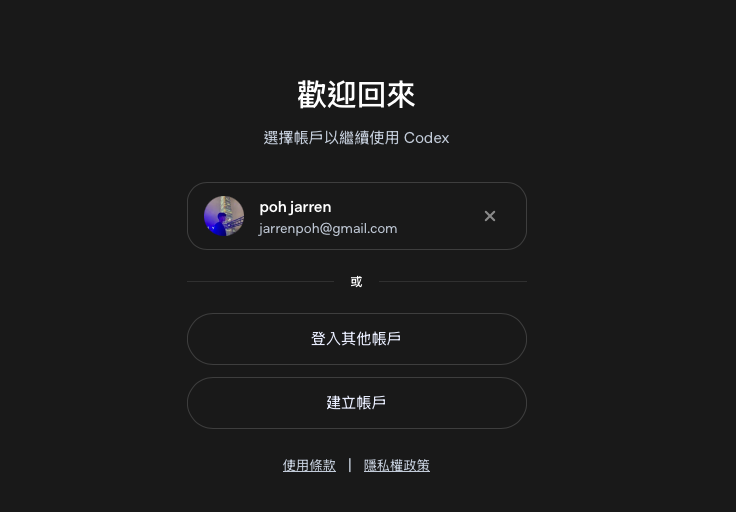
5. Log in to your ChatGPT account — open that URL in your browser and pick (or log in to) your ChatGPT account to continue with Codex.
6. Enter the device code — back in the terminal, check the 9-character code (e.g. KLHR-1RR9C).
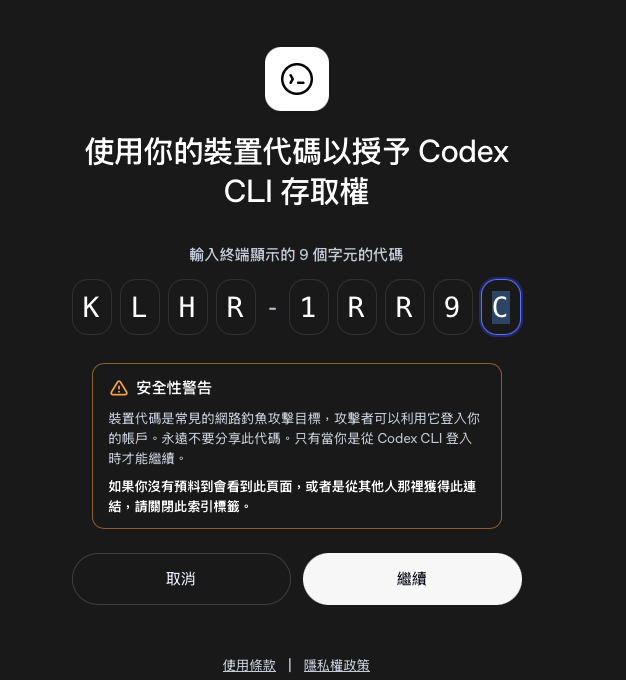
7. Confirm authorization — enter that code in the browser, read the security warning, and click Continue to grant the Codex CLI access.
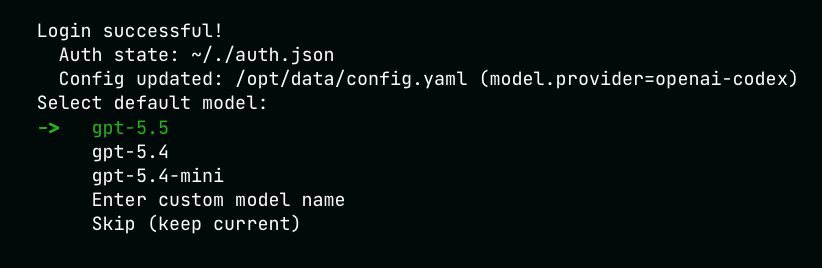
8. Done — the terminal shows Login successful! and Config updated: ...(model.provider=openai-codex). Pick a default model (e.g. gpt-5.5) to finish.
DeepSeek - Video

DeepSeek - Steps
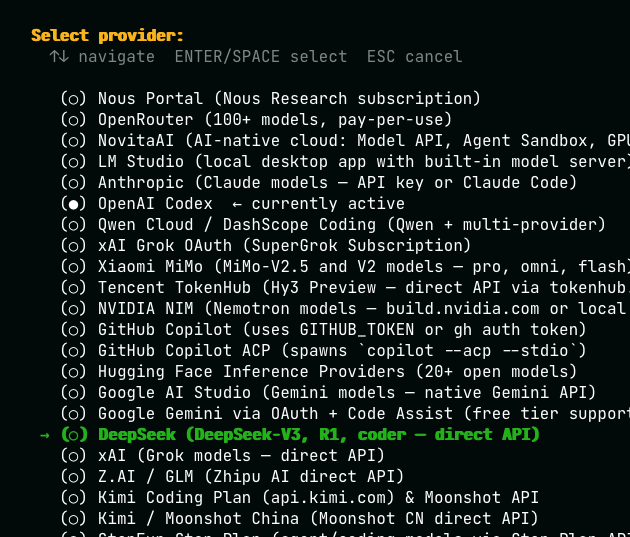
In the hermes model menu choose DeepSeek, get an API key from the platform, and paste it back into the terminal.
1. Open the terminal and run the command — in the HM-3 Terminal, wait for Connected to realvco-hm-3, then send the command.
hermes model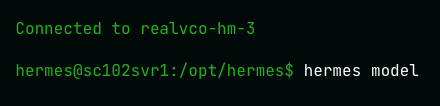
2. Choose the provider — in the Select provider list, arrow down to DeepSeek (DeepSeek-V3, R1, coder — direct API) and press Enter.
Next the wizard asks for your DeepSeek API key — get it from the platform first:
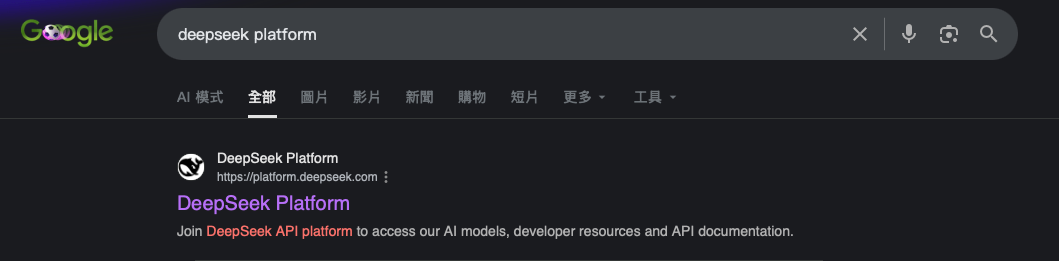
3. Open the DeepSeek platform — go to platform.deepseek.com.
4. Top up — click Top up on the left, pick an amount and pay (DeepSeek is prepaid, tokens are cheap, from $2).
5. Create an API key — click API keys → Create API key on the left, and copy it (shown only once).
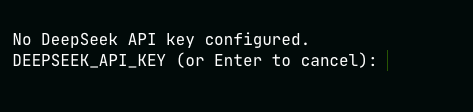
6. Paste back into the terminal — paste the key after DEEPSEEK_API_KEY (or Enter to cancel): and press Enter; API key saved. means it’s stored.
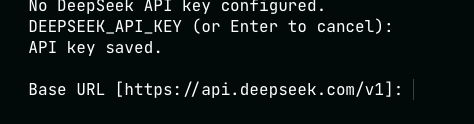
7. Confirm the Base URL — at Base URL, just press Enter to keep the default https://api.deepseek.com/v1.
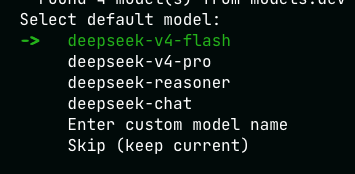
8. Choose a default model — at Select default model, pick a model (e.g. deepseek-v4-flash) to finish.